Everyone has a story to tell, here's mine sprinkled with some creative projects along the way. Thank you for stopping by and I hope you come back again.
Happy Tuesday. Here I am again, sharing another page inspired by another challenge. Do you love challenges too? What's your favorite? Please share cause maybe I haven't heard of it before.
I love the angle of the background paper and how the photos are separated. It's definitely out of my comfort zone.
I have all of my Christmas products together so I just pulled out that bag to make this page. It takes out the time that I would have had to spend going through all of my containers and bins to collect the items that I would like to use. How do you store your supplies?
I added some more wood stars here and some glittered snowflakes that I got at clearance after last years holiday season at Michael's.
Thanks for stopping by. Let me know if you have any questions with any of my pages.
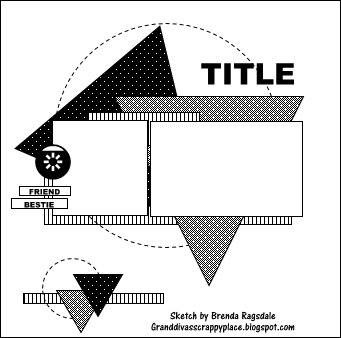
Happy Monday guys. How's your weekend? Mine was good. Relaxing and full of family time, just the way I like it. Today's layout share was based off of two challenge blogs. The first one is from Rochelle Spears' blog
In this page, I based the design on the sketch. I love how this sketch allowed me to work with circles and triangles, two shapes that I don't normally work with.
For Rochelle's challenge, I pulled out some tags in my stash, along with some brown ticket stubs that I got from a pocket letter.
I used my Silhouette die cut machine to make the "love" and then used some foam thickers for the word "scarf".
To dress up the tickets and also to use some fun emoji stamps that I got at Michael's about 6 months ago (yes I'm slow to use my new stuff sometimes) I heat embossed the icons onto the tickets before adhering them onto the page. I love how they add just a little bit of "fun" in this page.
I also pre-cut this die cut flower from the Cameo and decided that this page was the perfect place to add it.
So there you have it. I hope you were inspired by my page today.
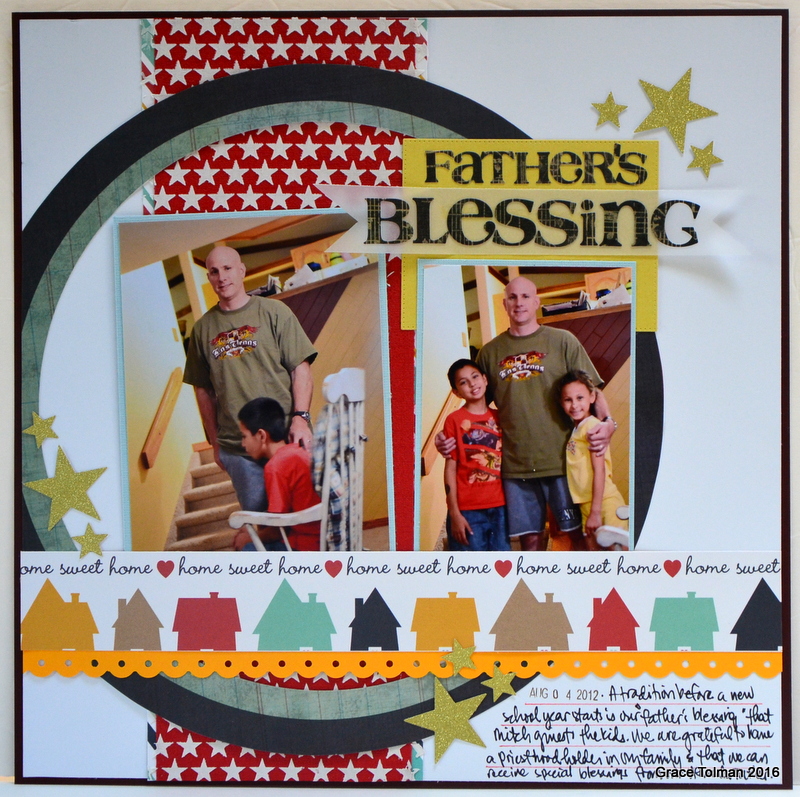
Happy Friday. Although we are gearing up for Halloween (here in the States) in some countries like the Philippines, they are already thinking of Christmas. Well that's my excuse anyways for sharing a holiday themed page. :)
I had way more than four photos for this specific event and I didn't want to do a double page layout cause the size of my photos seemed too small for a 12x24 page. I also flipped the sketch to it's side so the vertical photo placement can work with my horizontal pictures.
I added some stickers on the right side to give that space a bit more interest and also to use up more stash. Cause we all know that most scrappers have stash to last them a lifetime, at least this scrapper does. *wink*
I used my old typewriter to create my journaling.
I added some wood stars cause they match the wood look in one of my photos. I thought the "natural" look works best in this quite busy page.
I'm not very clever with titles so when I saw this big sticker, I went with it. It spoke to the theme of the page and I get to use up more stickers. :)
So that's it for me today. I hope you have a wonderful weekend.
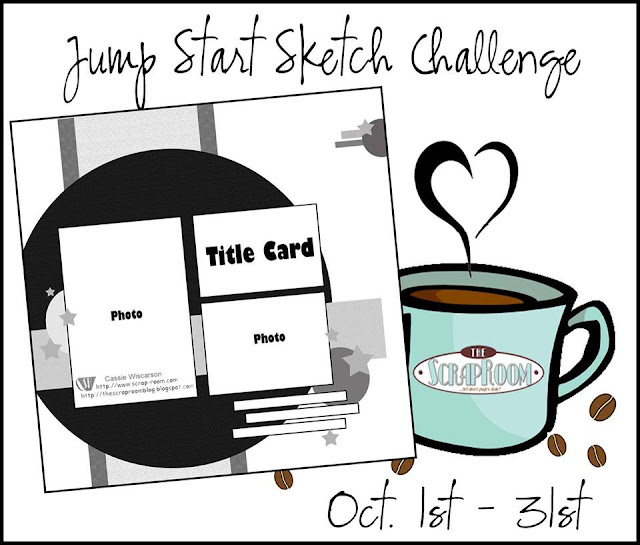
Happy Thursday friends. Today I'm going to share one of many pages that I've created recently. I love the beginning of the month cause then I get a new set of challenge prompts to work with. They are my favorite ways of branching outside of my comfort zone and even using some items that I've forgotten/neglected to play with.
If you can believe this, all of the items on this page except the white and dark brown cardstock is from my scrap stash. That circle paper one is from years ago.
I also entered this at the Paper Issues Facebook group Take 5 challenge. In this challenge, you are given specific prompts and you are to pick five out of that. I chose Cardstock, 3 Pattern papers, stars, white cardstock and mixed media.
For the mixed media, I used a star stencil and white modeling paste to add some texture and design to my red cardstock strip.
So that's it for me today. Make sure you stop by tomorrow for another page share.
Hello my dear crafty friends and welcome to my post for the Glue Dots and CardMaker's magazine blog hop. Before I go on with my projects, I wanted to let you know that there is a giveaway prepared for this blog hop. The form to enter the giveaway will be at the Glue Dots blog (the last one on the hop). And it will be open for a whole week.
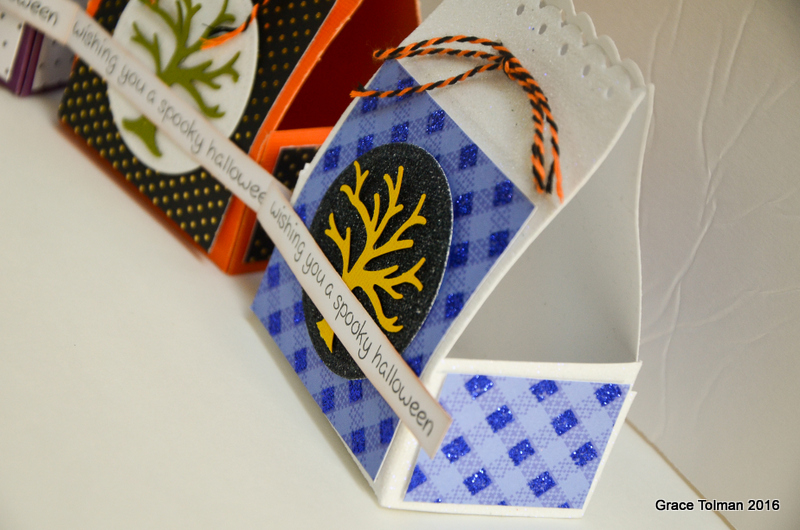
I love this time of the year. The crisp fall weather, the candies and cute costumes and of course the fun papercrafting projects we can make along with the holiday theme. Today I wanted to share with you thought that by focusing on the color and texture choices, you can create some fun Halloween gift boxes and cards without having to invest in too many Halloween themed products.
Below is a picture of the items that I had pulled out of my stash to make my projects....
And here's my first project....
I love to make gift and treat boxes around the holidays. They are the perfect little touch to add some personalization to your gifts. Plus they help me use my every growing stash. Win-win!
Here's a video showcasing my process for the project...
Directions for the box...
Cut a piece of cardstock measuring 7x12"
Score the piece horizontally at 1", 2", 5", 7", 10" and at 11"
Turn the paper vertically and score at 2" and at 5"
Fold the paper to emphasize the creases
Cut the 2x4" corners of the paper.
Cut a slit on the block between 5" and 7" up to the 2" vertical mark. Cut 1" off the panel.
Punch a decorative border on the ends of the box (the top flap)
Assemble the box using Glue Dots adhesive.
Cut some pattern papers 1/4" smaller than the box panels and adhere these papers onto the box using more Glue Dots adhesive.
Die cut a circle from glittered cardstock using some steel die.
Adhere the tree and add the stamped sentiment over it.
Punch two small holes on the top of the box using a hole puncher or the Crop-a-dile
Thread the twine through and tie into a bow.
And here are some close ups....
And since I already had the items on my table, I decided to use the leftovers to create some Halloween cards as well....
The video didn't show my whole process. Sorry about that. But as you can see, it doesn't take too long and much effort to create these cards. My favorite part of these cards are my stamped paper block. I was able to make my own patterned paper with the help of stamps. With that technique, you can pretty much personalize any card to fit your theme or sentiment.